
About Us
Welcome to Granite Kings & Construction! For nearly a decade, we have provided complete remodeling and construction solutions for numerous residential and commercial properties in Houston, Texas
Get a free quote
Welcome!... To Granite Kings

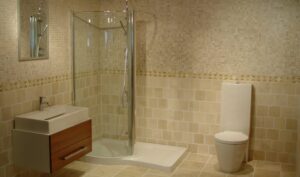
Drywall in bathroom demands special attention due to the high moisture levels present. Opt for moisture-resistant drywall, also known as greenboard or water-resistant drywall, specifically designed for damp areas like bathrooms. When installing, ensure direct contact with water is minimized; use cement board for tub surrounds or areas prone to splashing. For added protection, apply a primer and paint that are resistant to moisture. Regularly check for mold and mildew, especially in high-moisture areas, and promptly repair any damage using professional drywall techniques. Remember, proper ventilation is key to reducing the risk of mold growth in bathroom walls and ceilings.
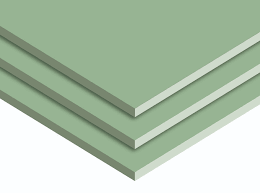
Choosing The Right Drywall Thickness
Installation Tips for Drywall in Bathroom Renovations
When it comes to drywall in bathroom renovations, following key installation tips is essential for a successful project.
Firstly, opt for moisture-resistant drywall like green board or water-resistant drywall to combat the high humidity levels typically found in bathrooms.
Secondly, ensure proper sealing of joints and gaps with drywall tape and joint compound to prevent moisture infiltration and mold growth.
Lastly, prioritize ventilation to mitigate moisture buildup, which can damage the drywall over time. By adhering to these guidelines, you can effectively install drywall in bathroom spaces, ensuring durability and longevity in the face of moisture and humidity challenges.
Essential Steps for Waterproofing Drywall in Bathroom
Waterproofing drywall in bathroom is crucial to prevent moisture-related issues like mold and mildew growth. Here are the essential steps in order to effectively waterproof drywall in bathroom:
- Select the Right Type of Drywall: Choose moisture-resistant drywall, commonly known as greenboard or water-resistant drywall, designed specifically for high-moisture areas like bathrooms.
- Prepare the Surface: Ensure the surface is clean, smooth, and free from any debris or dust. Sand the drywall lightly to create a smooth finish.
- Apply a Waterproofing Primer: Use a primer that is specifically formulated to resist moisture and create a protective barrier on the drywall surface.
- Install Waterproofing Membrane: Apply a waterproofing membrane over the primed drywall surface. This membrane acts as an additional layer of protection against moisture penetration.
- Seal Joints and Gaps: Use drywall tape and joint compound to seal any joints, corners, or gaps in the drywall. This helps prevent water from seeping into the walls.
- Install Tile or Other Wall Coverings: If desired, install tile or other waterproof wall coverings over the waterproofed drywall for added protection and aesthetic appeal.
- Seal Around Fixtures: Ensure that fixtures such as sinks, faucets, and tubs are properly sealed to prevent water from leaking behind the drywall.
- Finish with Waterproof Paint: For an extra layer of protection, finish the waterproofed drywall with waterproof paint that is resistant to moisture and mold growth.
By following these essential steps, you can effectively waterproof the drywall in bathroom, ensuring long-lasting durability and protection against moisture-related issues.
Step-By-Step – Mastering Drywall Finishing Expert Tips
Achieving Durability: Best Drywall Choices for Bathroom
When considering drywall in bathroom, selecting the right type is paramount for achieving durability amidst high moisture levels. Opting for moisture-resistant drywall, such as green board or water-resistant drywall, ensures longevity and protection against mold and mildew growth. These specialized types of drywall are designed specifically to withstand the humid conditions typical of bathroom environments, offering enhanced resistance to moisture compared to standard drywall. Investing in moisture-resistant drywall in bathroom walls and ceilings provides peace of mind, knowing that your surfaces are safeguarded against the damaging effects of water exposure.
Key Considerations for Drywall Repair in Bathroom
Spaces When it comes to drywall repair in bathroom spaces, there are several key considerations to keep in mind.
- Firstly, it’s important to address any underlying moisture issues that may have caused the damage in the first place. This could involve fixing leaks, improving ventilation, or using moisture-resistant drywall materials.
- Secondly, it’s crucial to ensure that the repair materials and techniques are suitable for the bathroom environment, which can be prone to humidity and temperature fluctuations.
- Additionally, proper preparation and priming of the repaired area is essential to prevent future damage.
- Lastly, selecting the right paint or finish for the bathroom walls can help to further protect the repaired drywall and maintain a clean and hygienic space.
Taking these considerations into account will result in a long-lasting and effective drywall repair in the bathroom.
Critical Do’s and Don’ts of Drywall in Bathroom Environments
When dealing with drywall in bathroom environments, adhering to critical do’s and don’ts ensures optimal performance and longevity. Here are the key guidelines to follow:
Do’s:
- Choose moisture-resistant drywall, like green board or water-resistant drywall, to combat high humidity levels.
- Seal joints and gaps using drywall tape and joint compound to prevent moisture infiltration.
- Apply a waterproof primer and paint to enhance moisture resistance and protect the drywall surface.
Don’ts:
- Avoid using standard drywall in bathrooms, as it is not designed to withstand moisture and may lead to mold and mildew growth.
- Don’t neglect proper ventilation; ensure bathrooms are adequately ventilated to reduce humidity levels and prevent moisture buildup.
- Refrain from installing drywall in direct contact with water sources like showers or tubs without proper waterproofing measures to prevent damage and mold growth.
Moisture-Proofing Your Bathroom with Green Board Drywall
Moisture-proofing your bathroom with green board drywall is essential for maintaining a durable and mold-resistant environment. Unlike regular drywall, green board drywall is specifically designed to withstand high-moisture conditions, making it an ideal choice for drywall in bathrooms. Its moisture-resistant properties help prevent mold growth and water damage, ensuring long-lasting protection for your bathroom walls and ceilings.
When installing drywall in bathroom areas, opting for green board ensures peace of mind, knowing that your surfaces are fortified against the harmful effects of humidity and moisture. With its reliable performance and resistance to moisture, green board drywall is a smart investment for any bathroom renovation project.
What is Greenboard?
Greenboard, also known as moisture-resistant drywall, is a type of drywall specifically designed for high-moisture areas like bathrooms. Unlike standard drywall, greenboard features a water-resistant gypsum core that is covered with a moisture-resistant paper facing. This unique composition makes greenboard more resistant to moisture and mold growth compared to regular drywall. It is commonly used in bathroom renovations and other damp environments where traditional drywall may be prone to damage from humidity and direct water exposure. Greenboard provides added protection against moisture-related issues, making it a preferred choice for drywall in bathroom applications.
Greenboard Versus Cement Board
When it comes to choosing between greenboard and cement board for your construction or renovation project, it’s important to consider the specific needs of the project.
Greenboard, or moisture-resistant drywall, is commonly used in areas with high humidity such as bathrooms and kitchens. However, it is not suitable for areas where it will be in direct contact with water, such as shower stalls.
On the other hand, cement board is a more durable and water-resistant option, making it ideal for wet areas like bathrooms and shower stalls. It is also recommended for use with ceramic and stone tiles.
Ultimately, the decision between greenboard and cement board will depend on the specific requirements of the project, with cement board being the preferred option for areas with high moisture and direct water exposure.
Can you tile over drywall in bathroom?
Yes, you can absolutely tile over drywall in bathroom. In fact, it is a common practice to do so. However, there are a few things to consider before proceeding. First, make sure the drywall is in good condition and free of any moisture or mold issues. If the drywall is damaged or not properly prepared, it can compromise the integrity of the tile installation.
Additionally, it is important to use the right type of adhesive and grout to ensure the tiles adhere properly and are water-resistant. Some professionals also recommend using a waterproofing membrane, especially in areas prone to splashing or moisture. Overall, tiling over drywall in bathroom can be a great option as long as proper preparation and materials are used to ensure a long-lasting and durable installation.
Common Mistakes to Avoid When Installing Drywall in Bathrooms
When installing drywall in bathrooms, it’s crucial to avoid common mistakes that can lead to costly repairs and maintenance issues.
One frequent error is using regular drywall instead of moisture-resistant options like green board or water-resistant drywall, which are specifically designed for high-moisture environments.
Additionally, failing to properly seal joints and gaps with drywall tape and joint compound can allow moisture to seep in, leading to mold and mildew growth.
Another common misstep is neglecting to provide adequate ventilation, which can result in moisture buildup and damage to the drywall.
By prioritizing the use of moisture-resistant drywall, thorough sealing, and proper ventilation, you can ensure the longevity and durability of your drywall in bathroom spaces.
Maintaining Drywall in High-Moisture Bathroom Areas
Maintaining drywall in high-moisture bathroom areas is essential in preventing mold and mildew growth. One way to protect drywall from moisture damage is to apply a waterproofing sealer or primer before painting. This additional barrier can help prevent water from seeping into the drywall and causing it to deteriorate.
Regularly inspecting the bathroom for any signs of water leaks or damage, such as peeling paint or soft spots on the walls, can also help catch any issues before they become more serious.
Ensuring the bathroom is properly ventilated, either through the use of exhaust fans or opening windows, can also help reduce moisture build-up. Finally, promptly addressing any water leaks or plumbing issues can prevent long-term damage to the drywall in high-moisture areas.
Innovative Solutions: Alternatives to Traditional Drywall in Bathrooms
Traditional drywall often falls short in bathrooms due to its susceptibility to moisture and humidity, which can lead to mold and mildew growth. Fortunately, there are innovative alternatives that offer better protection in these environments.
Cement board, for example, is a durable and moisture-resistant option that is also easy to install.
Another alternative is fiberglass mat gypsum panels, which are specifically designed for high-moisture areas and are mold and mildew resistant.
Additionally, some homeowners are turning to waterproof wall panels as a modern alternative that provides both waterproofing and insulation. These innovative solutions are increasing in popularity as they offer improved durability and protection against the damaging effects of moisture, making them a smart choice for bathroom construction and renovations.
For any questions you can call us at (281) 790-8478
Waterproofing Drywall: A Must for Bathroom Walls and Ceilings
When it comes to bathrooms, waterproofing drywall is a must for both walls and ceilings. The high moisture levels in bathrooms make them susceptible to mold and mildew, and using regular drywall can lead to water damage over time.
Waterproofing drywall with a moisture-resistant coating or using waterproof drywall materials can help prevent these issues and prolong the life of the bathroom walls and ceilings. It also provides peace of mind knowing that the surfaces are protected from water damage, which can be costly to repair. Whether it’s for a new construction or a bathroom renovation, ensuring that the drywall is properly waterproofed is essential for maintaining a durable and long-lasting bathroom space.
Choosing the Right Type of Drywall for Your Bathroom
When it comes to choosing the right type of drywall for your bathroom, it’s important to consider moisture resistance. Regular drywall can easily become damaged from the humidity and moisture levels typically found in bathrooms. In this case, it’s best to opt for moisture-resistant green board or cement board to ensure the longevity and durability of your bathroom walls.
Additionally, it’s also crucial to properly seal and paint the drywall to provide an extra layer of protection against potential water damage. By taking the time to choose the right type of drywall and properly prepare and finish it, you can ensure that your bathroom walls will remain in good condition for years to come. So, be sure to do your research and consult with a professional to determine the best drywall option for your specific bathroom needs.
DIY Drywall Repair in Bathroom Environments: Step-by-Step Guide
If you’re looking to tackle a DIY drywall repair in your bathroom, it’s important to follow a step-by-step guide to ensure the job is done properly.
- Start by cleaning the area around the damaged drywall, removing any loose debris and smoothing out the edges of the hole.
- Next, cut a piece of drywall to fit the hole, making sure to leave a small gap between the new piece and the existing drywall for joint compound.
- Secure the new piece in place with drywall screws, then apply joint compound over the seams, feathering it out to blend with the existing wall.
- Once the compound is dry, sand it down and apply a second coat if necessary. Finally, prime and paint the repaired area to complete the project.
Following these steps will ensure a professional-looking drywall repair in your bathroom environment.
Maximizing Longevity: Drywall Maintenance in Bathrooms
The key to maximizing the longevity of drywall in bathrooms is proper maintenance. Due to the high levels of moisture and humidity in bathrooms, drywall can deteriorate over time if not properly cared for. Regularly checking for and repairing any leaks or water damage is essential to preventing mold and mildew growth, which can significantly weaken the integrity of the drywall.
Additionally, using a high-quality primer and paint specifically designed for high-moisture areas can provide an extra layer of protection. Installing a ventilation system in the bathroom can also help reduce moisture levels and prolong the life of the drywall. By staying on top of maintenance and taking proactive measures, homeowners can ensure that their bathroom drywall remains in good condition for years to come.
Expert Advice: Drywall Finishing Techniques for Bathrooms
When it comes to finishing drywall in bathroom, it’s important to follow specific techniques to ensure a durable and moisture-resistant surface. Experts recommend using moisture-resistant drywall for bathroom installations, as well as applying a waterproof primer and paint to further protect the walls from moisture damage. It’s also crucial to properly tape and mud the seams to prevent water from seeping in and causing mold and mildew growth.
In addition, using a squeegee to smooth out joint compound and sanding between coats can help achieve a smooth and professional finish. Proper ventilation and allowing ample time for drying are also key factors in achieving a successful drywall finish in bathrooms. By following these expert techniques, homeowners can ensure their bathroom drywall will withstand the humidity and moisture present in the space.
Sanding and Finishing
Sanding and finishing are crucial steps in achieving a smooth and professional look for drywall in bathroom.
After the drywall mud has dried, sanding is necessary to smooth out any imperfections and create a seamless surface. Using a fine-grit sandpaper or a sanding sponge, gently sand the drywall until it feels smooth to the touch.
Be careful not to oversand and damage the drywall paper. Once sanded, apply a thin layer of drywall compound over the seams and joints using a putty knife.
After drying, sand again to blend the compound with the rest of the drywall surface.
Finally, prime and paint the drywall to complete the finishing process, ensuring a polished appearance for your bathroom walls and ceilings.
To prepare a consultation please call us at (281) 790-8478